Importance of Permissions
Security and authorizations are critical in HR systems that store a wide range of highly sensitive personal identifiable information (PII) and other information strongly protected by legislation, such as the General Data Protection Regulations (GDPR) in the European Union (EU) and the Health Insurance Portability and Accountability Act (HIPAA) in the United States. Being able to secure important information and provide access to the right users for the right population is very important. This is where the SAP SuccessFactors
Role-Based Permissions (RBP) framework comes into play.
As the name suggests, RBP provides a role-based permission framework that provides organizations with the ability to create multiple roles that can be assigned to users based on a various number of attributes, such as role (e.g., a manager), organizational structure, or a specific or dynamic group of users. The beauty of the framework is the high degree of precision that can be built to control access to data, objects, and transactions.
RBP applies to all modules in the suite, and the administration of RBP is performed via the Admin Center.
Note: In this article, we will be using the
Latest Role-Based Permissions user interface.
Key Concepts
As the name implies, the framework is based on roles, called Permission Roles in SAP SuccessFactors, that have permissions assigned to them. One or more roles can be configured in the system, and then these roles are assigned to a group of users (called Granted Users) to be effective on a target group of employees. This is demonstrated in Figure 1. In most cases, each user will have more than one role assigned to them. We’ll look at that in more detail shortly.
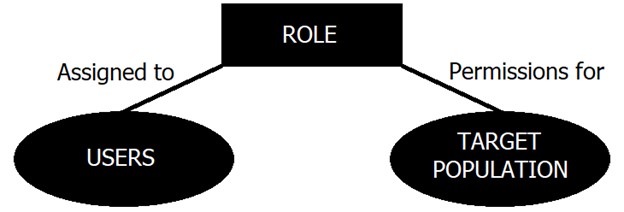 Figure 1: Role-Based Permissions
Let’s look at a practical example. You create a Manager Self Service role that contains permissions to view sensitive or restricted information (e.g., salary information) and perform actions or edit data (e.g., make a job change). This role is assigned to all managers and is set to be effective on their direct reports. We’ll cover these concepts in more detail further on in this article.
The advantage of a role-based permission system is that you don’t need to manage permissions for users when they are hired, move around the organization, or leave the company. With the right design, users will be automatically assigned the right permissions based on their organization assignment or other criteria. This prevents users from having permissions they shouldn’t be granted or having to wait for the correct permissions to be assigned when they join or move around. It also means those users that leave the organization no longer have access to the system or sensitive data.
It is important to plan roles carefully and consider design consideration. Governance, maintenance, and system performance are all impacted by how roles are designed and assigned. For example, the roles assigned to any user should not contain the same permission more than once, since this impacts system performance.
Permission Roles also protect access to sensitive data, such as Personally Identifiable Information (PII) or compensation data, which is often protected through legislation. More information regarding design and implementation considerations can be found in SAP’s
Implementation Design Principle (IDP) document on Role Based Permissions, which can be found in the
SAP SuccessFactors community on the SAP Community.
For companies operating in multiple countries, a best practice is to create a number of global roles (e.g., Employee Self-Service or HR Admin) with a set of country-specific roles for each country (e.g., Employee Self-Service Germany or Employee Self-Service Canada) that contain just the permissions required in those countries.
When building roles, it is recommended to follow the
principle of least privilege (PoLP). In this context, PoLP specifies that users should have least amount of access as is required to perform the actions in the SAP SuccessFactors that are needed and be able to see the minimum amount of data that is needed to perform their jobs.
Permissions
Access to data, objects, screens, actions, transactions, and more are controlled by permissions. Permissions are typically view or edit, but for some objects can have a much wider range of permissions, such as create, delete, view history, etc. This depends on the nature of what is being permissioned.
Permission Roles use permissions to grant access to users in the SAP SuccessFactors system. When creating Permission Roles—which we’ll cover shortly—one or more permissions are selected.
Examples of permissions include the following:
- Access the Org Chart
- View or edit fields on Employment Details portlet in the People Profile (when Employee Central is used)
- Manage Compensation Forms (when Compensation is used)
- Log in to the API
- Enable search in the Team Absence Calendar (when Employee Central Time Off is used)
- View history of Job Relationships (when Employee Central is used)
A full list of permissions and details about them can be found in the
List of Role-Based Permissions section of the
Using Role-Based Permissions guide on the
SAP Help Portal.
Creating Permission Roles
Roles are created and managed in the Admin Center in
Manage Permission Roles, as seen in Figure 2. Here you can create, view, edit, and delete Permission Roles, as well as assign them to users and target populations and view the change history.
 Figure 2: Manage Permission Roles
Creating a Permission Role has three steps:
- Basic Information: Details about the role, such as the name and description.
- Add Permission: Select the permissions to be part of the role.
- Preview: Review the role and save it.
Let’s look at creating a permission role to understand how they work. After navigating to
Manage Permission Roles in the Admin Center, click the
Create button (in the
legacy Role-Based Permissions user interface, the button is called
Create New and is located on the left side). You can see this to the far right in Figure 2. This takes you to the
Basic Information step.
In this step, enter a name for the role. You can optionally enter a description. For the
User Type field, there is currently only one option (Employee). The
RBP-Only field is only used to restrict the role from being used by other modules. In our example, we’ve added a name and description, as seen in Figure 3. Once the data has been entered, click
Next.
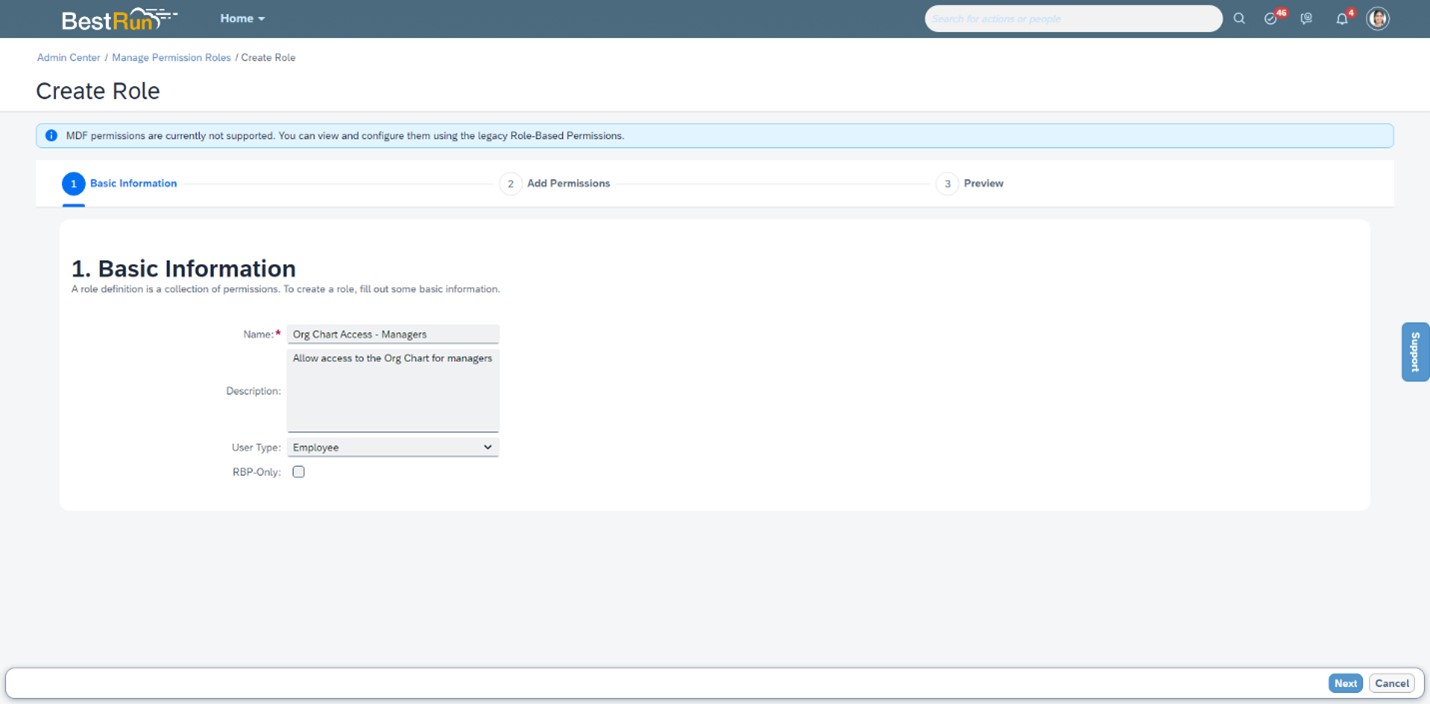 Figure 3: Entering Details about the Permission Role
On the
Add Permissions step, you can select the permissions you want in the role. Permissions are grouped into different categories, which are listed on the left side. Most of these are self-explanatory, but not every category name makes it obvious what permissions it has. In some cases, you will need to navigate through multiple categories to find the permission(s) you want.
In our role, we’re going to navigate to the General User Permission category and select the
Organization Chart Navigation Permission. You can see this in Figure 4. Once the permissions have been selected, click
Next.
 Figure 4: Selecting the Permissions
The Preview step gives you the opportunity to review your changes and save the role. You can see this in Figure 5. If you need to make changes, you can click Previous and make those changes. Clicking Save will save the role and bring up the
Success pop-up to confirm that the role is saved. In the Success pop-up, you have the option to assign the Permission Role. We’ll look at that a little later in this article.
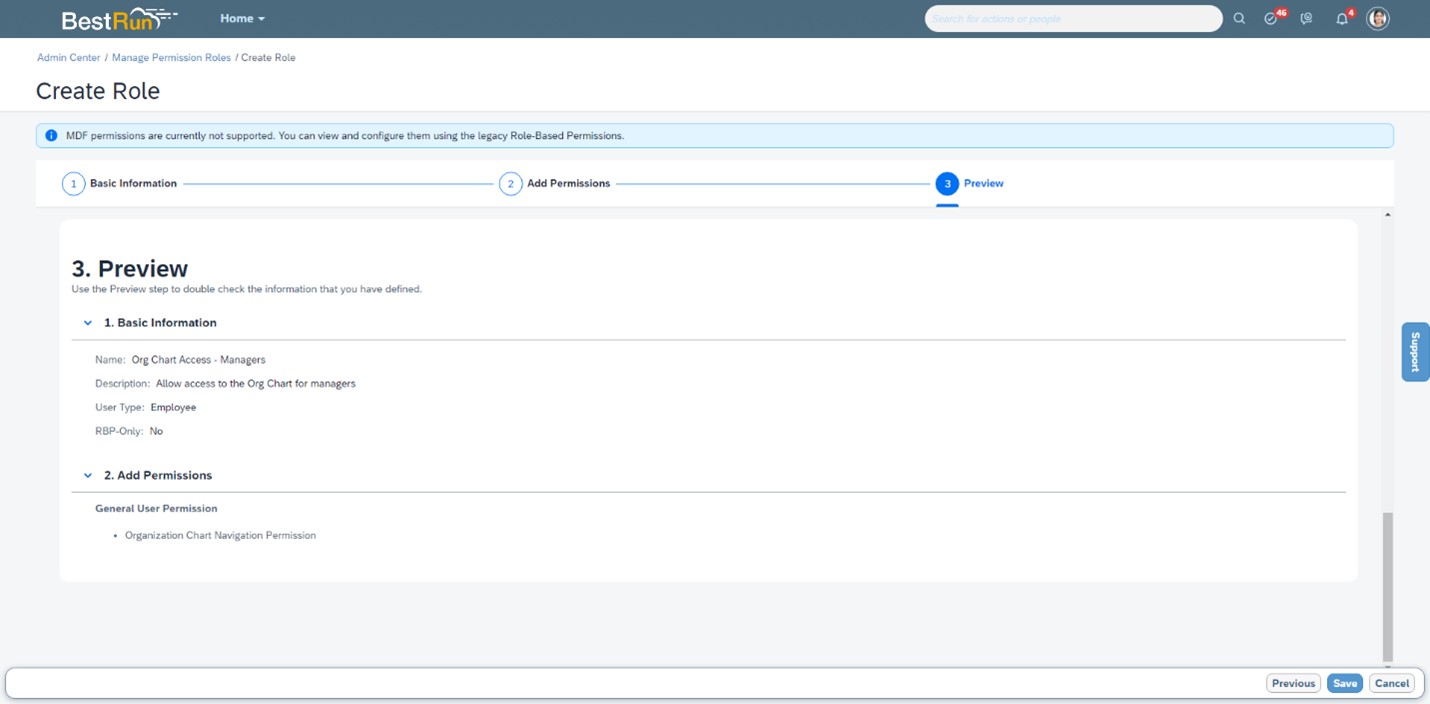 Figure 5: Reviewing the Permission Role
Permission Groups
Permission Groups are used to assign Permission Roles to a group of users. There are two types of Permission Group:
- Dynamic Permission Group: Dynamically assign users based on specific criteria
- Static Permission Group: A static list of users uploaded in a spreadsheet.
Permission Groups are created and managed in
Manage Permission Groups. This can be seen in Figure 6. Here you can see all Permission Groups in the system and perform various actions, depending on the type of Permission Group. Dynamic Permission Groups can be created, viewed, edited, and copied.
You can also view a summary or view the change history of Permissions Groups. Static Permission Groups can be created through import, deleted, and have members added or removed. You can also view a summary of a Static Permission Group.
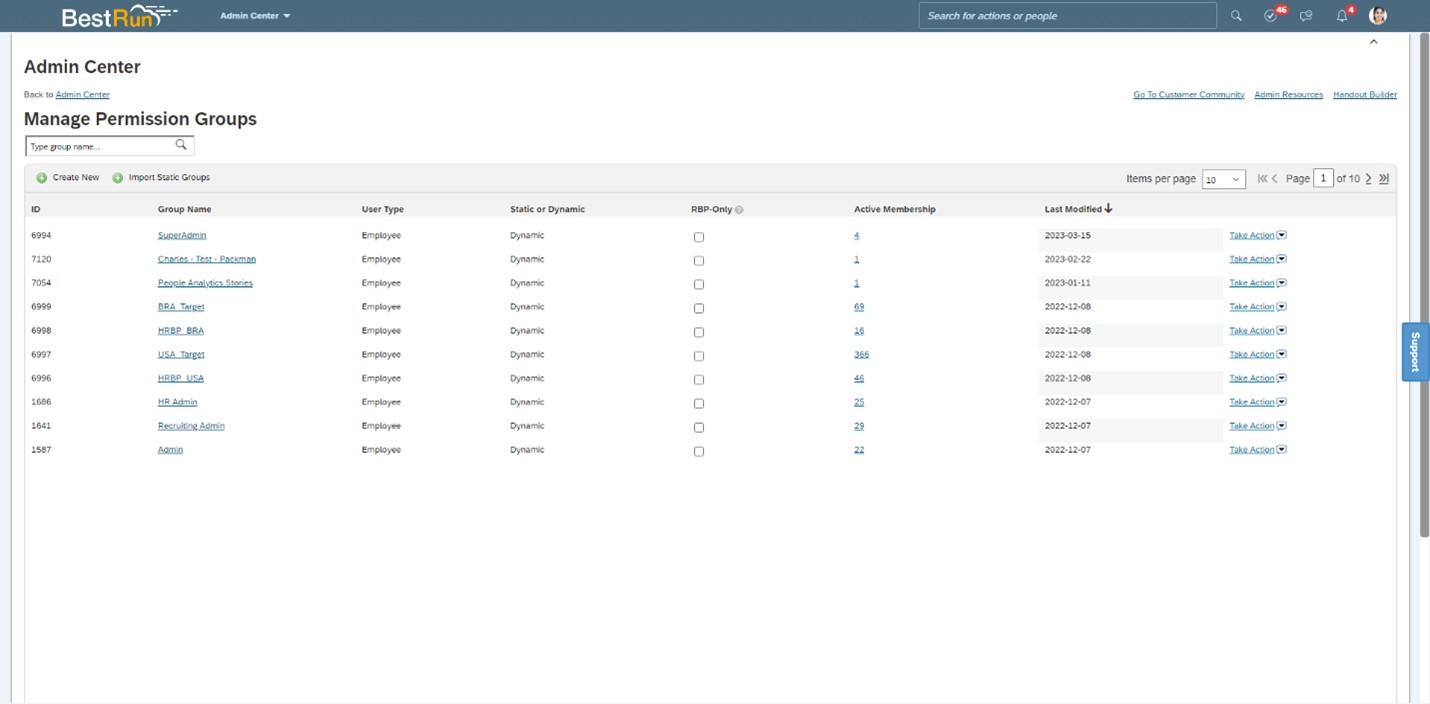 Figure 6: Manage Permission Groups
Clicking on a Permission Group displays the Permission Group, as seen in Figure 7. You can also edit that Permission Group in the same window and also see which Permission Roles it has been granted to.
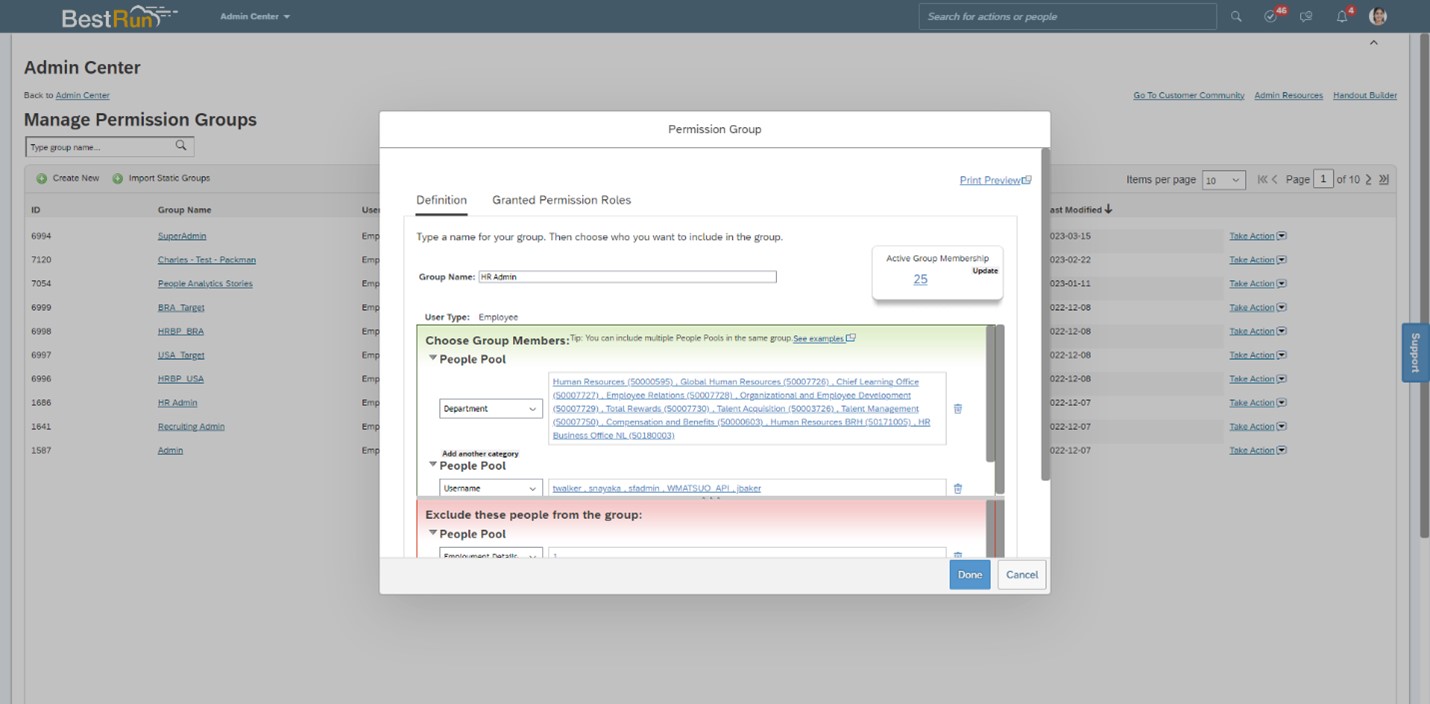 Figure 7: A Permission Group
Permission Groups provide various criteria to select the users, such as Division, Department, or one of the many talent attributes in the system. This list of criteria can also be customized to add any available fields in the system. Specific users can be selected by using the User or Username criteria. Multiple criteria can be used in combination to select the specific users required in the group.
Role Assignment
As mentioned, Permission Roles are assigned to users and target populations. Permission Roles are assigned by clicking
Add Role Assignments in
Manage Permission Roles or selecting
Yes in the Success pop-up when saving a newly created Permission Role.
Assigning a Permission Role has four steps:
- Basic Information: details about the assignment, such as the name and description.
- Grant Access To
- Define a Target Population
- Preview: review the assignment and save it.
We’ll assign the Permission Role we created earlier to show how this process works.
In the
Basic Information step, enter a name for the assignment. You can optionally enter a description. For the
Target Population User Type field, there is currently only one option (Employee). The
Status field is used to determine if this assignment is active or inactive. In our example, we’ve added a name and description, as seen in Figure 8. Once the data has been entered, click
Next.
 Figure 8: Entering Details about the Assignment
In the
Grant Access To step, the group of users who will be granted the permissions defined in the Permission Role are defined. First, you must select which type of users will receive the permissions from a drop-down list. This list has a fixed number of options, including Employees, Managers, HR Managers, and the matrix roles defined in Employee Central (when Employee Central is used). For our assignment, we’ll select Managers. There are then two options for the group of users:
- All: This selects all users.
- From groups: This enables a Permission Group to be used to select the users.
We’ll select
All, meaning that all managers will be assigned this role. You can see this in Figure 9. Once the data has been selected, click
Next.
 Figure 9: Selecting the Granted Group of Users
The
Define a Target Population step is where the target population of the role is selected. The options available here depend on the group of users selected in the previous step. In our assignment, we have options to determine which reports of the manager will be the target of the assignment.
We’ve selected
Granted Users’ Direct Reports, which means the permissions in the Permission Role will be applied for the direct reports of a manager. We’ve also selected that all indirect reports will be the target of the assignment. It is possible to restrict this to no direct reports, 1 level down, 2 levels down, or 3 levels down. The managers themselves can also be restricted from having the permissions applied to them. You can see these configuration options in Figure 10.
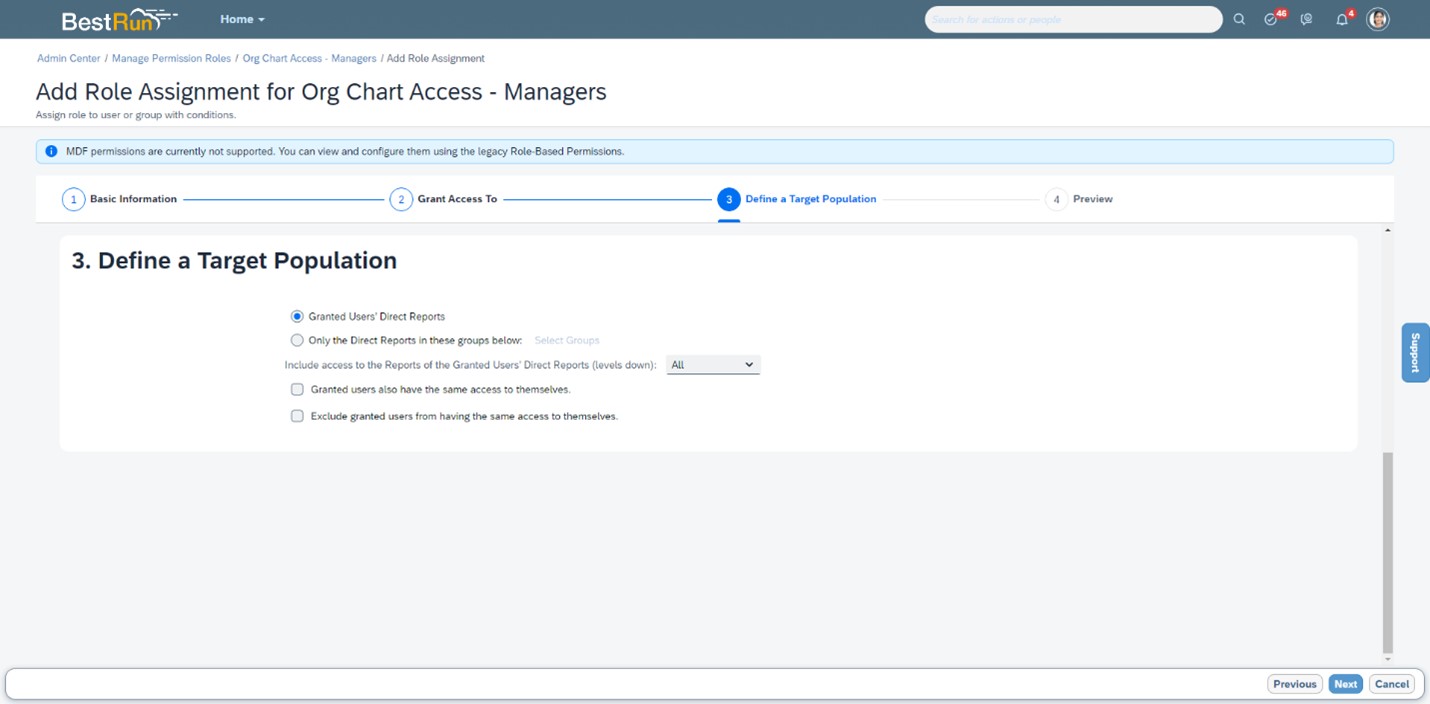 Figure 10: Selecting the Target Group of Users
The Preview step gives you the opportunity to review your changes and save the assignment. You can see this in Figure 11. If you need to make changes, you can click Previous and make those changes. Clicking Save will save the assignment and take you to the
Assignments tab of the Permission Role, where you can see this assignment and any other assignments. You can see this in Figure 12.
 Figure 11: Previewing the Assignment
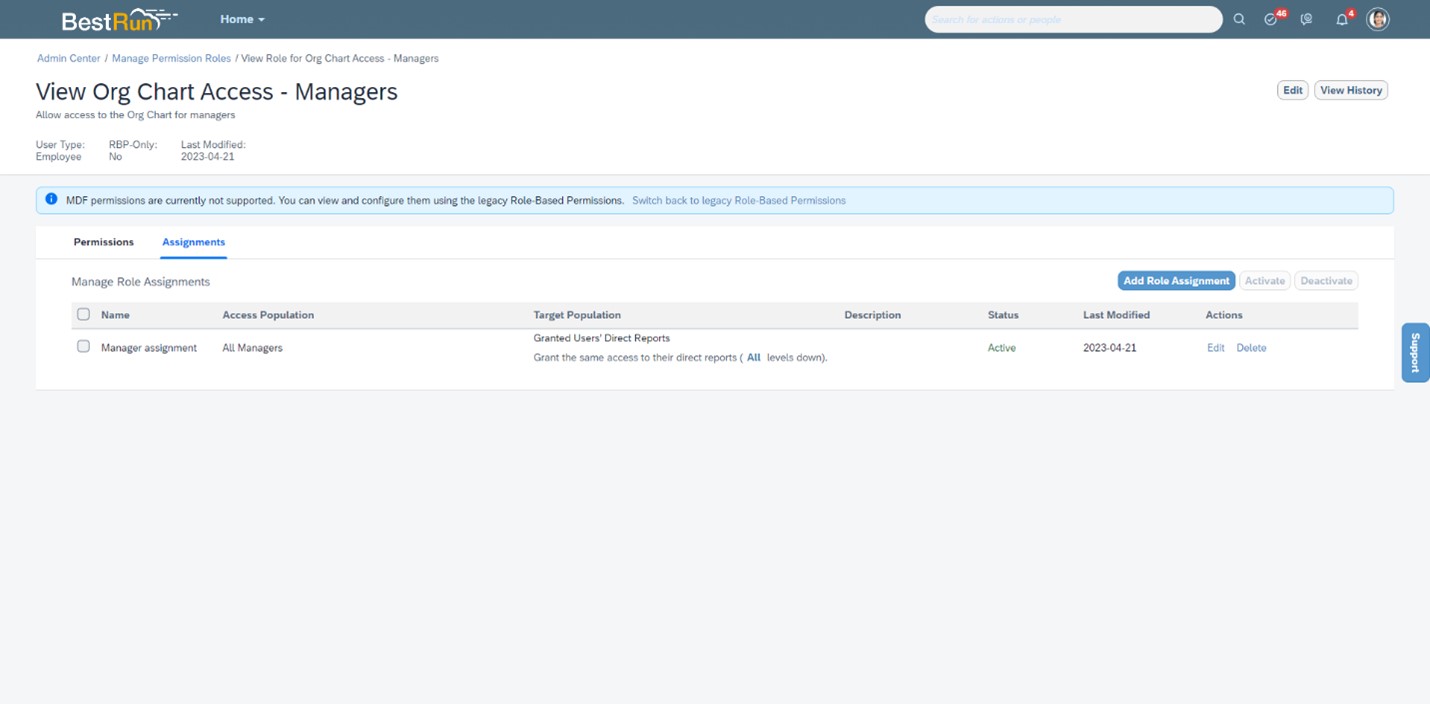
Figure 12: The Assignments of a Permission Role
Viewing a Permission Role
To view a Permission Role and see the permissions and assignments assigned, you can simply click on the name of the Permission Role in
Manage Permission Roles. This will open the Permission Role on the
Permissions tab, which shows all of the permissions by category. You can see this in Figure 13. Navigating to the
Assignments tab will show all of the assignments for that Permission Role. We looked at this in Figure 12 in the previous section.
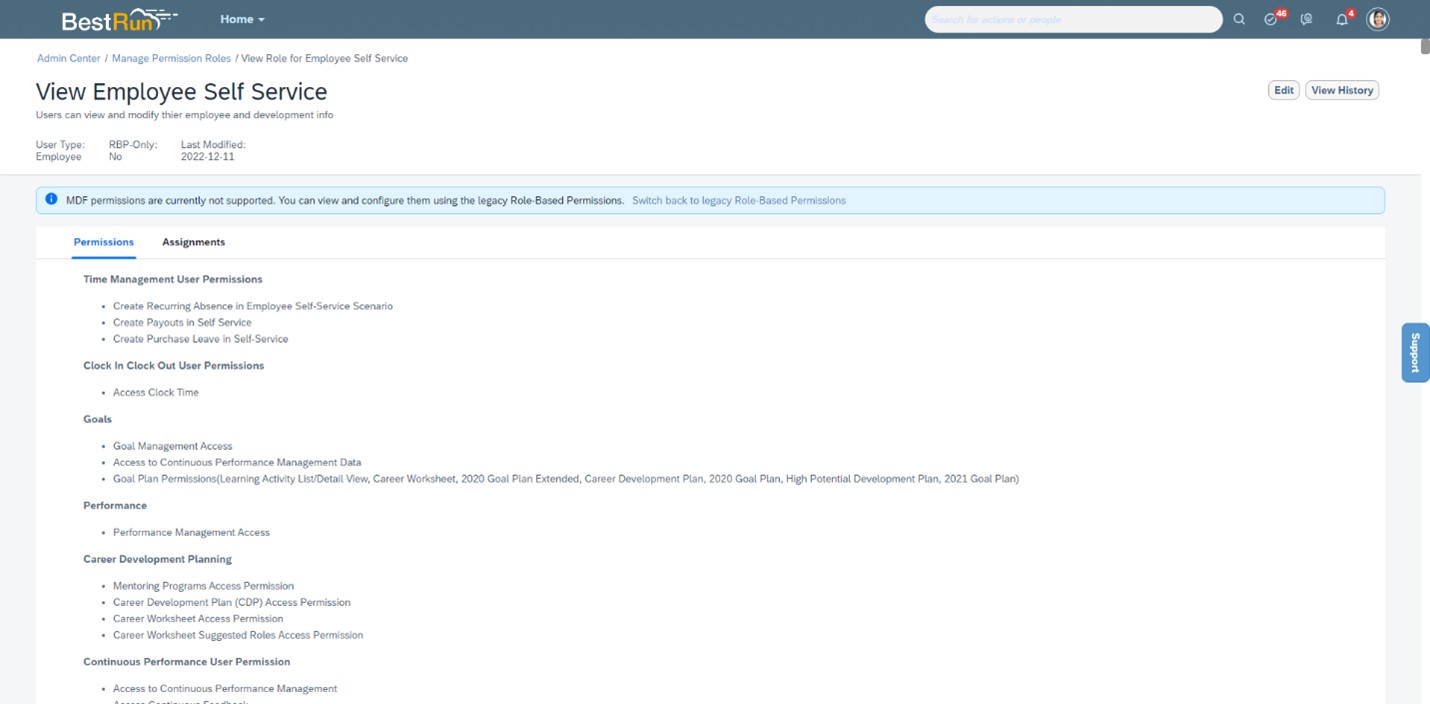 Figure 13: Viewing a Permission Role
Role-Based Permission Access
In order to be able to view or edit RBPs, permission has to be granted to the users that are allowed to view or edit RBPs. In this context, RBPs means Permission Roles, Permission Groups, and other RBP-related activities in the system. Even the ability to assign these permissions has to be granted to users before they can apply them. This is done via
Manage Role-Based Permission Access in Admin Center.
In a newly provisioned SAP SuccessFactors system, only the designated Super Admin can access
Manage Role-Based Permission Access. The Super Admin can then provide access to
Manage Role-Based Permission Access to other users in
Manage Role-Based Permission Access. The Super Admin can also assign users to be able to view RBPs or edit RBPs in
Manage Role-Based Permission Access. You can see what
Manage Role-Based Permission Access looks like in Figure 14.
 Figure 14: Manage Role-Based Permission Access
Reviewing Permissions by User
There are two options available in the Admin Center to review permission assignments on a user level. This is useful to review the permissions of a user and can help in troubleshooting when RBP permissions and assignments are not working correctly.
The first is
User Role Search. This enables a search to be performed on one or two users to see what specific roles are granted to those users based on a permission. The search is performed by selecting a permission category and then selecting a permission to search on. Optional criteria to select a target user is also available. Once the search is run, it will display the Permission Roles granted to the users and permission searched for. You can see this in Figure 15.
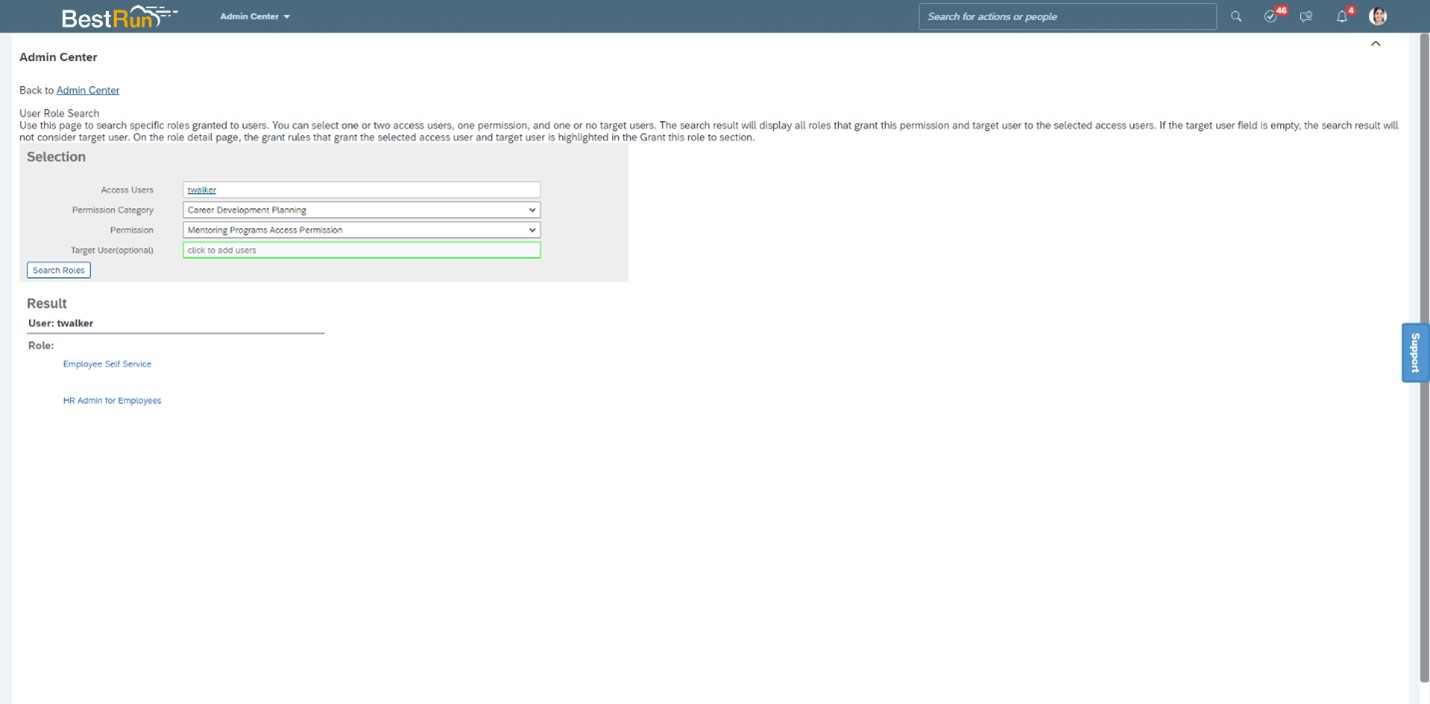 Figure 15: User Role Search
The second is
View User Permission. This enables a search to be performed on a user to see what permissions they have assigned. The output displays the permissions by permission category and which Permission Role(s) the permissions have been granted by.
You can also navigate to a Permission Role by clicking the icon next to the Permission Role’s name. This search is useful to understand what permissions have been assigned, from which roles, and which roles are providing the same permission multiple times. You can see the output of a search in Figure 16.
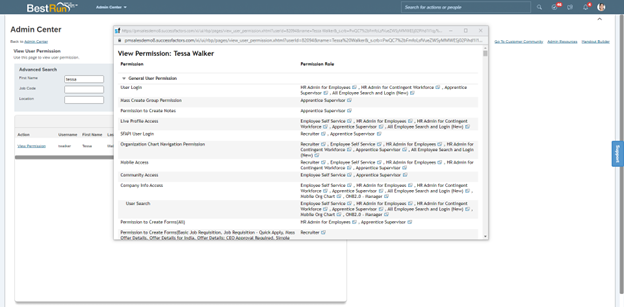 Figure 16: View User Permission
Reporting
There are four reports available in SAP SuccessFactors Report Center to report on RBPs. It is recommended to run and review these reports on a regular basis to that ensure the correct access has been granted to users. The four reports are:
- RBP User to Role Report: Reports on the Permission Roles assigned to each user, along with the granted and target populations.
- RBP Permission to User Report: Reports on the specific permissions assigned to each user.
- RBP User to Group Report: Reports on Permission Groups that users are in.
- RBP Permission Roles Report: Reports on the Permission Roles and their assignments to granted and target populations.
Figure 17 shows an example of an RBP User to Role Report.
 Figure 17: RBP User to Role Report
In addition to these reports, there are also four change audit reports provided in
Change Audit Reports in the Admin Center.
- RBP Role Change Report: Reports on changes made to Permission Roles.
- RBP Group Change Report: Reports on changes made to Permission Groups.
- RBP User Role Change Report: Reports on changes made to Permission Roles assignments.
- RBP Static Group Membership Change Report: Reports on changes made to membership of static Permission Groups.
Summary
The RBP framework in SAP SuccessFactors provides a granular approach to managing roles and permissions across SAP SuccessFactors. It provides numerous capabilities to manage, create, and report on the permissions that are set up in the system.