See how to program an Object Value Selector (OVS) in Web Dynpro. Then you can populate multiple fields or carry out a custom search for one or more fields.
Key Concept
The Object Value Selector (OVS), unlike other Web Dynpro search help options, adds a friendly search help allowing users to search for values based on criteria involving multiple field values.
Web Dynpro is a technology used by HCM developers for the development of applications. While developing HR Web Dynpro ABAP (WDA) applications, you may be required to provide a custom search help for searching using one or more fields or for populating multiple fields such as IDs and Description. One of the ways of doing this is with an Object Value Selector (OVS).
In this case, a search help may provide a number of field values from a given table or a number of tables. I show how to program the OVS to make search helps. After showing the advantage of using an OVS, I then discuss the technicalities involved, such as the different phases of selection and the steps in programming an OVS in Web Dynpro. Finally, you see a full-fledged working example with coding and illustrations. The example shows an input help for an Employee Number field for fetching the number and naming a list of employees.
Object Value Selector: An Overview
A general search help for Web Dynpro fields has its own limitations. It may be connected to a single field (i.e., to the one to which it is bound). There may be situations in which you need to fill more than one field or search through multiple values stored in a database based on a given set of criteria. This is where the OVS comes into action.
The OVS allows you to display a set of selection fields. You can then make a selection from the result set that is displayed. Before diving into the details of the creation steps for an OVS, I first explain what a particular OVS looks like. Suppose you have an input field Employee Number and text view Employee Name fields. Pressing F4 displays the OVS help, as shown in Figure 1.
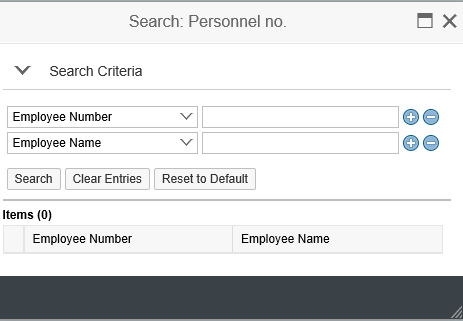
Figure 1
OVS display
Entering the selection criteria in the fields populates the values in the data area as shown in Figure 2. You enter an employee number and name in the fields in Figure 1 and then click the Search button to display the names in Figure 2.

Figure 2
Find all names beginning with A
Selecting an appropriate value populates the Employee Number field and Employee Name fields. It is also possible for the user to populate the selection fields with the default selection criteria, such as * or A*.
The OVS functionality is added to a given Web Dynpro component (the consumer component) using the OVS component. During communication, an event is generated by the OVS component. An event handler method in the consumer component reacts to the event fired by the OVS component. The event is triggered four times; each time, the relevant phase number is passed to the event handler method. Based on the given phase indicator, the relevant information is read and passed to the OVS component. For sending the required information to the OVS component, a number of methods are used.
In specific instances, the OVS component may need information from the Web Dynpro component using it. For this purpose, the OVS event is generated by the OVS component. The PHASE_INDICATOR value denotes the information needed.
OVS help is integrated into Web Dynpro applications by using the Web Dynpro component WDR_OVS. A typical operation of the consumer component and the OVS component is shown in Figure 3.
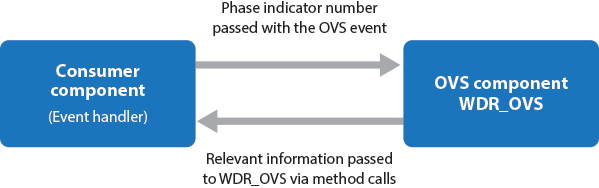
Figure 3
Consumer component and OVS component interaction diagram
The OVS component has a phase model that is composed of four phases: 0, 1, 2, and 3:
Phase 0: At the occurrence of phase 0, the relevant OVS component is configured. For example, at this time, you can:
· Assign a suitable title to the search help window
· Specify the column title of the output list
· Specify whether multiple lines of the table can be selected or not
The method SET_CONFIGURATION is used for this purpose.
Phase 1: This phase is optional. Here, you control whether the search fields are to display, and if so, this phase lets you control the default values displayed. If this is omitted, the table list values are displayed directly. The method SET_INPUT_STRUCTURE is displayed.
Phase 2: In this phase, the entries from the underlying table are read from the database and displayed in the form of the hit list (result set). The SET_OUTPUT_TABLE method is used here. The result set is displayed within the view results of the OVS component WDS_OVR. Any values read in the selection fields are used while reading the table values (i.e., selection criteria). These values are available in the attribute QUERY_PARAMETERS.
Phase 3: In this final phase once the result set is displayed, the user can select a given line (or lines). In its simplest form, only one row can be selected. The selected row values are then available for further processing in the instance attribute SELECTION.
Steps in OVS Help Creation
Now that you have some idea of the OVS help, I walk you through the steps involved in creating a fully working search help. In my example, a Web Dynpro component contains a view with an input field for Personnel Number and a corresponding Description field.
First, provide an OVS for the Employee input field. After you choose the OVS help, a set of input fields is provided for Personnel Number and Name (each showing *). You can choose to view all applicable personnel numbers and names using *, or you can search numbers and names using a certain section’s criteria. Based on the criteria you choose, a number of values may appear in the result set. After you select a given entry, the input fields Employee Number and Employee Name are populated.
Follow these steps:
1. Create a Web Dynpro component with the name YTEST_OVS. Execute transaction code SE80. In the screen the system opens, enter the name YTEST_OVS and click the display icon (the glasses), as shown in Figure 4. Make sure to choose Web Dynpro Comp./Intf from the drop-down menu.

Figure 4
Web Dynpro component
A dialog box appears, as shown in Figure 5.
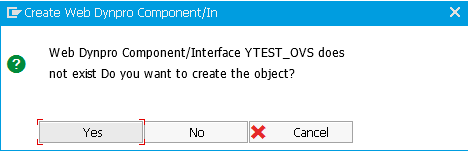
Figure 5
Create a Web Dynpro Component dialog box
2. Select Yes and press Enter. In the next screen enter the description, select the Web Dynpro component type, and press Enter as shown in Figure 6. The other fields are populated automatically.

Figure 6
Select the type of component
This action creates the Web Dynpro component along with the necessary window, views, and controllers (Figure 7).
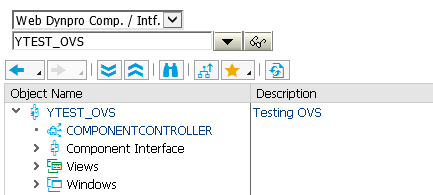
Figure 7
Elements of the new Web Dynpro component
3. Now comes the most important part. Declare the component usage of the WDR_OVS in the used Web Dynpro component list. As you see in
Figure 8, you have used this component and defined the component use as USAGE_OVS.
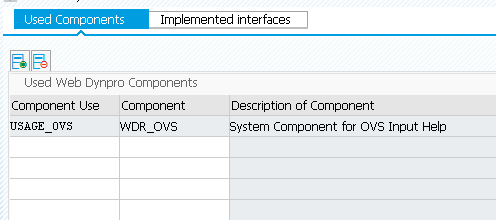
Figure 8
Used components
Next, go to the respective main view by double-clicking the View node on the left pane. In the Properties tab, click the Create Controller Usage button. This action opens a dialog box that lists the Component Use entries (Figure 9). Make sure you select the entry Component Use OVS with Interface Controller, as shown in Figure 9. Then press Enter or click the green checkmark icon.
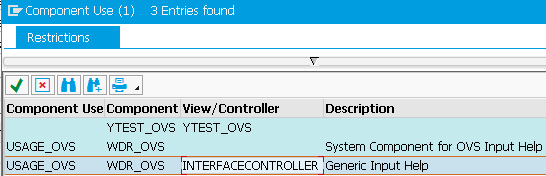
Figure 9
Component use
The View Properties now look like the ones shown in Figure 10. There is a tab on View named Properties.
Figure 10
The Properties tab
4. Specify the context attributes within the view pertaining to the employee number and name. In the main view, right-click the Context node. From the context menu choose Create > Attribute options. For example, give a name to the attribute with the type PERSNO. Most importantly, select Object Value Selector from the options in the drop-down menu in the Input Help Mode field, as shown in Figure 11. In the OVS Component Usage field, select the OVS using F4 help.
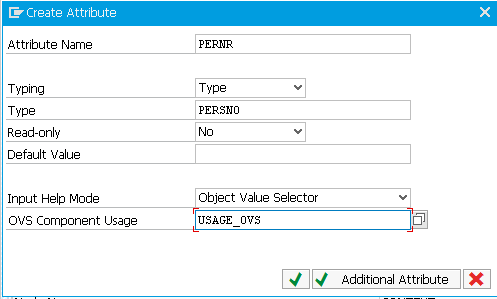
Figure 11
Create the attribute PERNR
Then press Enter. Now create another attribute with the name Employee Name and abbreviate it as ENAME. In the Input Help Mode field, select Automatic from the drop-down list of options, as shown in Figure 12.

Figure 12
ENAME attribute creation
5. Define the layout with relevant fields. In the Layout tab of the view, right-click the node ROOTUIELEMENTCONTAINER, which is on the top right side of the screen. Click Insert Element. A pop-up screen appears (Figure 13).
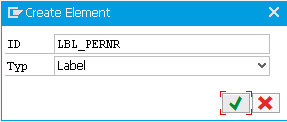
Figure 13
Label creation
Now enter LBL_PERNR in the Name field, select Label as the type, and then click the green checkmark icon to move on. Create another user interface (UI) element with the name INPUT_PERNR and specify InputField as the field type (Figure 14).
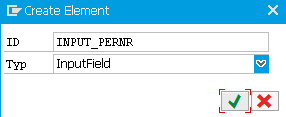
Figure 14
Specify the field type
Finally, create a UI element TEXTVIEW_ENAME and specify TextView in the field type, as shown in Figure 15. Click the green checkmark to move to Figure 16.
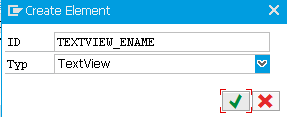
Figure 15
Specify the TextView
For the LBL_PERNR properties, select INPUT_PERNR from the dropdown for LabelFor and then enter INPUT_PERNR in the text field, as shown in Figure 16.

Figure 16
LABEL_PERNR properties
Then, attach the binding of the PERNR_INPUT to the PERNR attribute, as shown in Figure 17.
Click the value F4 help and then choose the TheBinding button for the Value field of the INPUT_PERNR. This action opens a pop-up dialog box that shows the context. Select PERNR_ID and press Enter.
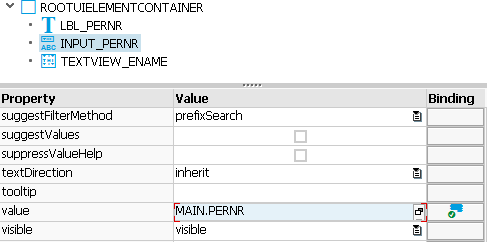
Figure 17
Binding MAIN.PERNR to INPUT_PERNR
Next, create binding for the TEXTVIEW_ENAME and bind it to the MAIN.ENAME (Figure 18).

Figure 18
MAIN.ENAME bound to the ENAME field
Select the Methods tab to specify the event handler for the given OVS. Specify the method ON_OVS_HELP, as shown in Figure 19.

Figure 19
View methods
Most importantly, specify the event that triggers this handler. In my example, link this to the OVS event. Specify the name of the method and select Event Handler as the method type. Press F4 within the Column event. From the input help that appears, select the event OVS (the first line), as shown in Figure 20.
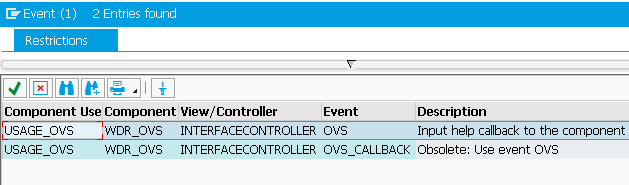
Figure 20
Select an OVS event
Once this is done, the Methods tab looks like the screen in Figure 21.
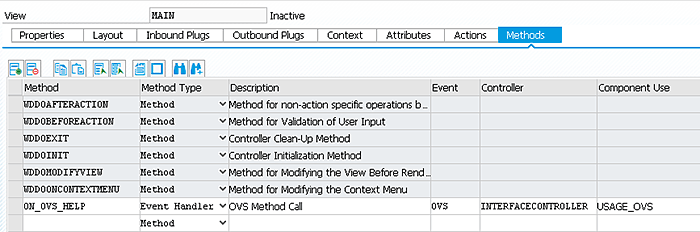
Figure 21
Details in the Methods tab
Finally, double-click the method name ON_OVW_HELP and enter the code shown in Figure 22.
method on_ovs_help . types:
begin of lty_stru_input,
* add fields for the display of your search input here
pernr type string,
ename type string,
end of lty_stru_input.
types:
begin of lty_stru_list,
* add fields for the selection list here
pernr type string,
ename type string,
end of lty_stru_list.
data: ls_search_input type lty_stru_input,
lt_select_list type standard table of lty_stru_list,
ls_text type wdr_name_value,
lt_label_texts type wdr_name_value_list,
lt_column_texts type wdr_name_value_list,
lv_window_title type string,
lv_table_header type string.
field-symbols: <ls_query_params> type lty_stru_input,
<ls_selection> type lty_stru_list.
case ovs_callback_object->phase_indicator.
when if_wd_ovs=>co_phase_0.
ls_text-name = `PERNR`.
ls_text-value = `Employee Number`.
insert ls_text into table lt_label_texts.
ls_text-name = `ENAME`.
ls_text-value = `Employee Name`.
insert ls_text into table lt_label_texts.
ls_text-name = `PERNR`.
ls_text-value = `Employee Number`.
insert ls_text into table lt_column_texts.
ls_text-name = `ENAME`.
ls_text-value = 'Employee Name'.
insert ls_text into table lt_column_texts.
ovs_callback_object->set_configuration(
label_texts = lt_label_texts
column_texts = lt_column_texts
window_title = lv_window_title
table_header = lv_table_header ).
when if_wd_ovs=>co_phase_1. "set search structure and defaults
ovs_callback_object->context_element->get_static_attributes(
importing static_attributes = ls_search_input ).
ovs_callback_object->set_input_structure(
input = ls_search_input ).
when if_wd_ovs=>co_phase_2.
assign ovs_callback_object->query_parameters->*
to <ls_query_params>.
* call business logic for a table of possible values
data(pernr) = <ls_query_params>-pernr.
data(ename) = <ls_query_params>-ename.
replace all occurrences of '*' in pernr with '%' .
replace all occurrences of '*' in ename with '%' .
if pernr ne ' ' and ename ne ' '.
select pernr ename from pa0001 into table lt_select_list
where pernr like pernr and
ename like ename .
elseif pernr eq ' ' and ename ne ' '.
select pernr ename from pa0001 into table lt_select_list
where pernr like pernr
.
elseif pernr ne ' ' and ename eq ' '.
select pernr ename from pa0001 into table lt_select_list
where ename like ename .
endif.
ovs_callback_object->set_output_table( output = lt_select_list ).
when if_wd_ovs=>co_phase_3.
* apply result
assign ovs_callback_object->selection->* to <ls_selection>.
if <ls_selection> is assigned.
ovs_callback_object->context_element->set_attribute(
name = 'PERNR'
value = <ls_selection>-pernr ).
ovs_callback_object->context_element->set_attribute(
name = 'ENAME'
value = <ls_selection>-ename ).
endif.
endcase.
endmethod.
Figure 22
Event handler coding
Save the Web Dynpro application and activate the given component by pressing CTRL + F3.
The OVS event is generated four times, one by one. Each time the event handler is called, the object OVS_CALLBACK_OBJECT is passed as a parameter. Within this object, there is an attribute PHASE Indicator, which is also passed to the event handler. At the first call, the phase value is 0, then 1, then 2, and then 3. For passing information to the OVS component, a number of methods of the OVS component are available. The OVS_CALLBACK_OBJECT reference is used to call these methods. The methods provided by the callback object are SET_CONFIGURATION (), SET_INPUT_STRUCTURE (), and SET_OUTPUT_TABLE ().
Now that the required configuration is done and the relevant coding is written, you are ready to test the HCM Web Dynpro application. Upon using the F4 help, OVS appears, as shown in Figure 23.

Figure 23
OVS Help
Try entering A* in the name selection field and click the Search button. The system displays the employees that have names beginning with A as shown in Figure 2.
If you need to select a name using Exact Selection, omit the asterisk. After you select a given name row, the corresponding personnel number and name fields defined in the MAIN view are populated with the selection (Figure 24).

Figure 24
Populated Personnel no. and name fields
Rehan Zaidi
Rehan Zaidi is a consultant for several international SAP clients (both on-site and remotely) on a wide range of SAP technical and functional requirements, and also provides writing and documentation services for their SAP- and ABAP-related products. He started working with SAP in 1999 and writing about his experiences in 2001. Rehan has written several articles for both SAP Professional Journal and HR Expert, and also has a number of popular SAP- and ABAP-related books to his credit.
You may contact the author at
erpdomain@gmail.com.
If you have comments about this article or publication, or would like to submit an article idea, please contact the
editor.