SAP HANA’s spatial feature is part of a platform that stores both geospatial and business data. Akash Kumar shows how to use it to perform operations such as distance calculation between objects, the union of objects, and analytics on spatial data.
Key Concept
Geospatial HANA allows users to store massive amounts of data in real time on maps and then to visualize it.The real-time spatial information can be used in many industries, including retail, transportation, oil and gas, manufacturing, media, and defense.
The spatial data is stored in columnar tables as points and various other forms of polygons. For example, a company office can be stored as a point or an area can be stored as a polygon. The most common operations performed on spatial data are calculating the distance between geometries and union or intersection of objects. An example of a union of objects would be the combined sales figures from two oil fields. Methods and constructors are used to access and manipulate the data.
Geometry is the super type for all the following spatial data types in HANA. A column defined as a geometry can store both linestring and multipolygon values. The spatial data type hierarchy is shown in
Figure 1.
- A point is a single location on a map used to represent locations such as addresses.
- A multipoint is a collection of individual points used to show multiple locations such as multiple addresses.
- A linestring is a geometry with a length, but without any area. It is used for rivers and roads.
- A multistring is a collection of linestrings and is used to represent geographic features.
- A polygon defines a region in space and is used to represent towns, states, and geographic features such as parks.
- A multipolygon is a collection of zero or more polygons and is used to represent geographic features such as a system of lakes.

Figure 1
Hierarchy of ST_Geometry
The prefix ST is used for all the data types in the hierarchy. The class ST_Geometry is a super class, whereas all the other data types are derived classes.
Note
The diagram in Figure 1 with A and B shows inheritance (i.e., A
is a superclass of B). Inheritance is a concept in object-oriented
programming (OOP). A similar concept is also applied in a spatial data
hierarchy.
SAP HANA Extended Services (XS) can be thought of as a lightweight application web server that runs on top of HANA. It provides an opportunity for a lower cost of development as well as performance benefits because of the closeness of the application and flow logic to a database. XS provides the ability to create applications that have an HTTP-based user interface (UI), such as a browser and mobile apps, that runs directly on SAP HANA without additional external servers or system landscape components.
XS allows the development on the server side using JavaScript, which has the file extension .xsjs. XSJS allows you to perform insert, delete, and update operations in HANA. In my example I have created XSJS files in step 3 that are called from map.js. The steps to show HANA spatial data on a geospatial map follow.
Step 1. Create an XS Project
Go to HANA Studio and follow menu path File > New > Project. In the screen that appears (
Figure 2) enter the Project name and click the Next button.

Figure 2
Name the project
In the next screen (
Figure 3) the highlighted workspace is the link between your local system and HANA. It allows you to synchronize the changes done in the local system with the repository, which further is shared with other team members. This allows everyone to see the recent changes done in the code. Select the workspace and enter the Repository Package in
Figure 3. All the workspaces by default come under Repository Workspaces. Click any workspace, select it, and then click the Finish button to create the project.

Figure 3
Workspace and repository package
Step 2. Import the Data to HANA
You can either upload the files to HANA or create the data by using a SQL query. I use the first way to import ESRI files into HANA. Following are the spatial data formats for import and export services:
- Well-known text – It is maintained by the Open Geospatial Consortium and data is expressed in ASCII text. More information can be found at www.opengeospatial.org/standards/geopackage.
- Well-known binary – It is maintained by the Open Geospatial Consortium and data is expressed in binary streams. More information can be found at www.opengeospatial.org/standards/geopackage.
- ESRI shapefiles – A shapefile is a digital vector storage format for storing geometric location and associated attribute information. It is developed and regulated by ESRI. More details can be found at www.esri.com/library/whitepapers/pdfs/shapefile.pdf.
- GeoJSON – This is always an object (in JSON terms) and is used for encoding a variety of geographic data structures. Method ST_AsGeoJSON is used for converting SQL output to the GeoJSON format. More information can be found at www.geojson.org/geojson-spec.html.
To upload the file to HANA, follow menu path File > import to go to the Import screen shown in
Figure 4. Select the type of file to be imported. In my example I selected ESRI Shapefiles. Click the Next button to go to the screen shown in
Figure 5.

Figure 4
Select the file type

Figure 5
The HANA system
Select the HANA system where you want the file to be imported from the matching items and click the Next button. There is only one system in my example.
In the next screen (
Figure 6) click the Browse button to select the location from which the file is to be imported. Click the Next button to go to the next screen (
Figure 7).

Figure 6
File import location

Figure 7
Schema details
Enter the schema in the text box in
Figure 7 and click the Finish button. Once you enter the schema the Finish button becomes active. A schema is a collection of metadata that describes the relation in a database. It is a container of objects. In my example the schema is my employee ID so I have left it blank in the figure.The other fields, such as Replace existing tables, are used when you want to replace the existing table schema with the new import schema.
The data I imported is shown in
Figure 8. The table has fields such as STATEFP, COUNTYRFP, and GEOID. A GEOID is a field in the table that shows the location coordinate.

Figure 8
Spatial data preview
The second method is to create a spatial table by a SQL query. You should have a geospatial data type field in the table to hold spatial data. The query shown in
Figure 9 creates a table with two columns in which the column location of type ST_point stores spatial data. I wrote an insert statement to insert the spatial data into the table. You can modify the SQL query according to your business scenarios. The data after the insert is shown in
Figure 10.

Figure 9
Geospatial query

Figure 10
Data in the table after the insert
Step 3. Create Extended Services to Expose HANA Spatial Data
I have created XSJS service to access the geospatial data. The XS server accepts the HTTP request from the browser and maps it to database queries and procedure calls. The main logic (which is performance intensive) remains in SQL script procedures or views, whereas XS works as a smaller server in the middle, as shown in
Figure 11. The XSIS service provides basic functionality such as validation logic.

Figure 11
A flow diagram for my example
With XS you can create an application that runs on SAP HANA without additional external servers. When you are building a new application from start, it makes sense to consider using XS.
In my example I have taken the data from HANA in GeoJson format and then shown it on a map. GeoJson, a subset of the JSON standard, is used to encode geographic information. It supports the following geometry types:
- Point
- Multipoint
- Linestring
- Multilinestring
- Polygon
- Multipolygon
Geospatial HANA provides a lot of methods for processing spatial data. I have used method ST_AsGeoJSON as it returns a string representing a geometry in JSON format.
XSJS supports server-side application programming in JavaScript. The server application exposes authorized data for consumption at a client GUI such as a web browser. The steps to create server-side code in HANA Studio are as follows.
Create an application descriptor file. The application descriptor is the core file that you use to describe an application’s availability within XS. Follow menu path File > New > Other to go to
Figure 12. Select XS Application Descriptor File and click the Next button to go to
Figure 13.

Figure 12
Type of project

Figure 13
Select the HANA project
The application descriptor file has no contents and no name. It only has the file extension .xsapp. Click the Finish button.
Create an application access file. This file is placed in the package to which you want to grant access. To create the file follow menu path File > New > Other to go to
Figure 14. Click the XS Application Access File option and then the Next button to go to
Figure 15.
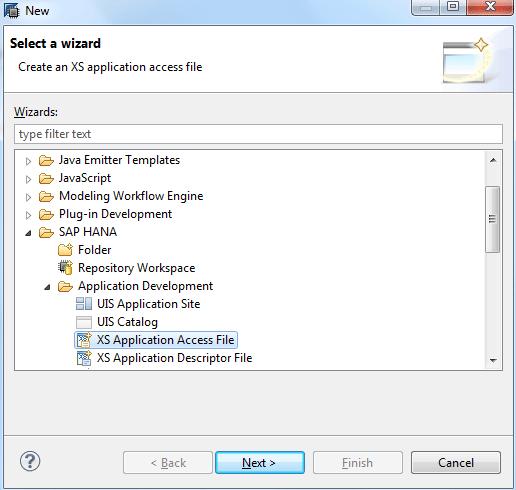
Figure 14
File type

Figure 15
Select the project
The parent folder is where you want to put the access file from the list of folders shown in Figure 15. The rules defined in the .xsaccess file apply to the package it resides in as well as any subpackages lower in the package hierarchy. The parent folder in my example (GIS_HANA_JN) is shown in Figure 15. Select the parent folder and click the Finish button.
You need to write the code shown in
Figure 16 in the application access file. It tells about the authentication mechanism to access the application. In my example I used basic authentication.

Figure 16
Code in access file
Next, you create the .xsjs file to write the code to fetch the data from HANA. Follow menu path File > New > File to go to
Figure 17. Enter the file name (e.g., Expose_Spatial_Data.xsjs) and click the Finish button.

Figure 17
File name and HANA project
Double-click the file name Expose_Spatial_Data in Project Explorer to go to
Figure 18. The code in
Figure 18 is executed when HANA handles a URL request. It fetches the spatial data from HANA and is called from an Ajax Query.

Figure 18
Geospatial query and XS code
Step 4. Consume Extended Services on a Web Browser to Display Spatial Data
- Initialize the leaflet
- Initialize the map
- Consume the extended services created in step 3 on the UI
Initialize the Leaflet
Leaflet is a modern open-source JavaScript library for mobile-friendly interactive maps. It is designed with simplicity, performance, and usability in mind. It works efficiently across all major desktop and mobile platforms out of the box, taking advantage of HTML5 and Cascading Style Sheets (CSS) 3 on modern browsers while still being accessible on older ones. Follow these steps to access the maps.
I created a file index.html for which I wrote code by using the following steps. The file is called from the browser URL. Include a leaflet CSS file in the head section of your document by writing the code in
Figure 19 in index.html.

Figure 19
CSS of the leaflet
Include a leaflet JavaScript file by writing the code in
Figure 20 in index.html.

Figure 20
JavaScript file of the leaflet
Put a
div element with a certain
id where you want your map to be by using the code in
Figure 21.

Figure 21
Division tag
Make sure the map container has a defined height, for example, by setting it in CSS as shown in
Figure 22.

Figure 22
Define the height
More details on the above steps can be found at the
leaflet website.
The index.html (
Figure 23) calls the map.js, which further calls the Ajax services and initializes the map. Select index.html from project explorer and click run as a Web App Preview to run the code in Index.html. It launches a browser in the new tab of HANA Studio.

Figure 23
Index.html code called from the URL
Initialize the Map
In this step you call up a blank map
(Figure 24) without the location points.

Figure 24
The initial map
First, I initialize the map, set its view to my geographical coordinates, and set a zoom level with the code in
Figure 25.

Figure 25
Map setup code
The coordinates 28.188, -51.196 set the map view to the US so that the location points are visible. The next steps are to add a tile layer to the map. (The tile layer is the map image that comes from the mapbox.) You write the URL template for the tile images as shown in
Figure 26 of map.js. There are many providers, such as Mapbox and CloudMade.

Figure 26
Tile layer code in map.js
Creating a tile layer usually involves setting the URL template for the tile images, the attribution text, and the maximum zoom level of the layer. There are many reasons for using Mapbox, but the main one is that it is free. The process is as follows:
- Sign up on Mapbox
- Create a tile map
You receive an ID once the map is created. You enter the ID in the URL where you see the blue line in
Figure 26.
Consume Extended Services Created in Step 3 on the UI
I have used Ajax to consume XSJS as shown in
Figure 27. The code calls the XSJS that fetches the spatial data from HANA. The data is then shown on the map.

Figure 27
Ajax code
Now the application is up and can be viewed on the local host.
The spatial file I uploaded has five different locations of the US that are now visible on a geospatial graph as shown in
Figure 28. Similarly, you can upload the business data and analyze it.

Figure 28
Spatial data on the web