Using the Data Provider – Information (XML) tool within Web Application Designer 7, find out how to give users the ability to easily search in a predefined set of values, instead of all values in the regular SAP search screen.
Key Concept
The process of providing users a predefined set of values for searches uses the following objects: an HTML input field into which the user enters the search term, an XML output (Data Provider – Information Web item) to use for searching with the pre-defined query, and some JavaScript functions to read the XML (XPATH) and filter the report.
The basic variable screen you get when adding a Ready for Input variable to an InfoObject on a query (Figure 1) looks OK. However, it is almost unchangeable. You cannot add any functionality to it or change its look and feel.

Figure 1
A variable definition screen
I am always disturbed when I try to search the list of values, but cannot control the values in the list. You can decide if the list is coming from the posted values (values coming from the InfoProvider) or from the InfoObject values as shown in Figure 2, but you cannot restrict the list further.
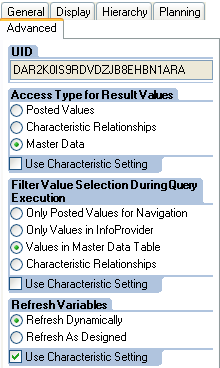
Figure 2
Filtered InfoObject values screen
I’m going to show you how to use the Data Provider – Information (XML) tool within Web Application Designer (WAD) 7 to add a simple search capability on a query variable. For example, if you want to find a specific customer with a name starting with or containing the string Dan, you can give the user a simple HTML input field in which he or she can enter the phrase to search. If there is only one match, the query is automatically filtered. Otherwise, the user sees a list of matching results. You will see how to add customized search capabilities based on a separated query that you can use to build your own list of values to be used by the search.
The scenario that I am going to work with involves a basic query over the 0COUNTRY InfoObject with a variable (VAR_COUNTRY2) that is ready for input and optional. As you can see in Figure 3, optional means that the user does not have to enter a value to restrict the InfoObject. In that case the query returns all values without any restriction. The query will have a filter over the 0COUNTRY InfoObject. I use the same InfoObject on the rows of the query, as you can see in Figure 4.
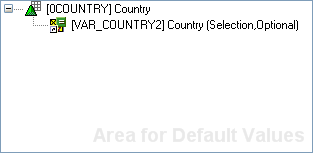
Figure 3
The 0COUNTRY variable
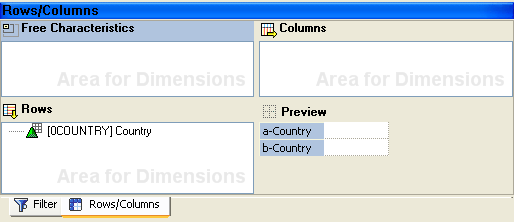
Figure 4
Query structure
You can filter the data as much as you want, including having countries from specific continents. To do this, I build a Web template using WAD. It has a simple HTML input field into which the user enters the search phrase, a command button to search, and an analysis Web item to show the filtered result set.
Let’s start with a blank Web template. Open the WAD and choose a new blank template. Insert the query as DP_COUNTRY_LIST based on the query COUNTRY_LIST in my example. Then add a basic HTML table with three rows and one column. In the first row enter Country:. Then add an HTML input field by clicking the menu item Insert and choosing Any Tag (Figure 5).
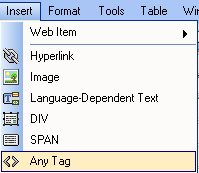
Figure 5
Add an Any Tag HTML tag
Click the Any Tag row shown in Figure 5 to get to the screen shown in Figure 6. Click INPUT.

Figure 6
Add an HTML tag
Then click the OK button to get to Figure 7, which is the attributes screen where you update two fields. The user enters the following information on the screen: The id should be SearchTerm and the title should be Please enter a search phrase. The title shows up when you hover the mouse over the Input Tag. The onkeypress should be return submitenter(this,event). That checks if the user presses Enter to fire the search.
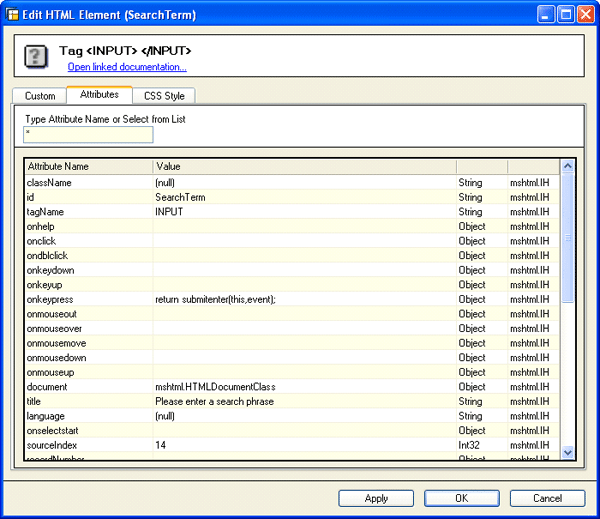
Figure 7
HTML Input Tag attributes screen
Now you add a button group item with an empty button named Search. You drag the Button group Web item from the Web items list on the left part of the template design screen to the main area of the template. On the parameters screen (Figure 8) enter the caption Search in the first row.
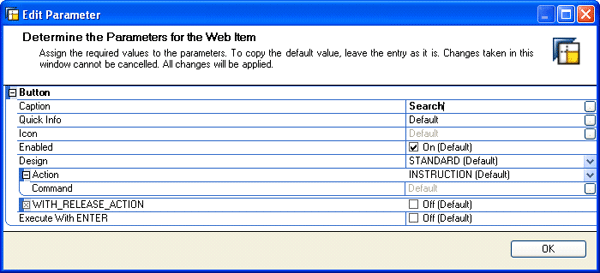
Figure 8
Button group Web item parameters screen
Click the OK button to get to the screen in Figure 9.
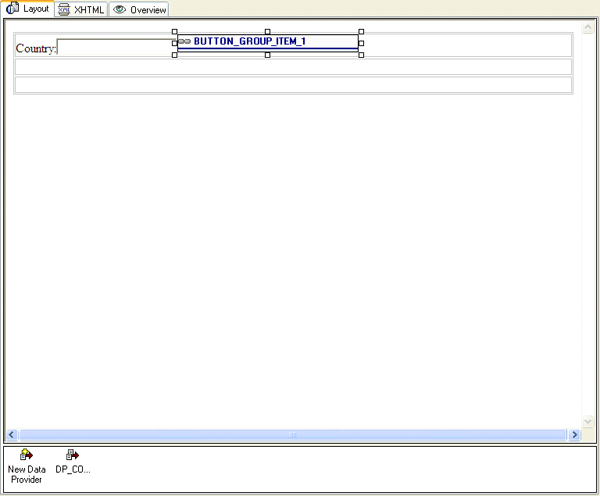
Figure 9
The template after you define the caption
Next I am going to add an internal HTML table to hold the returned list of values in case there is more than one result. Click anywhere on the second row (which is blank) on the screen shown in Figure 9. Insert a new table with one row and one column. Drag another basic HTML table as you did earlier in Figure 5. In the attributes screen give it an id. In my example I use CountriesTbl. The name should be accurate and case sensitive. Figure 10 shows the HTML table properties into which you enter the ID mentioned above.
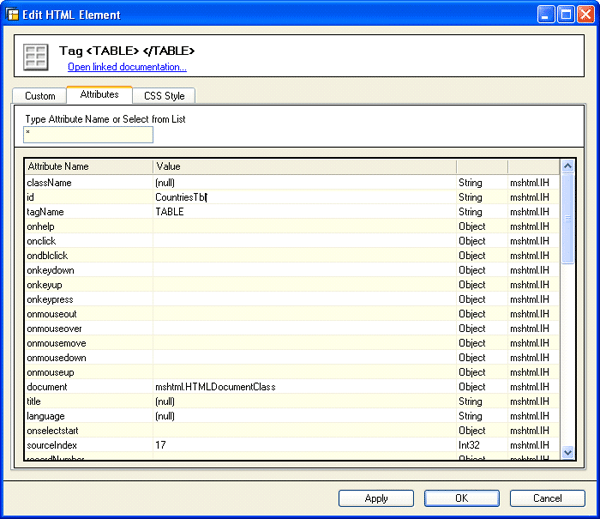
Figure 10
HTML table properties
Set the table’s display to none by entering the word none on the display row shown in Figure 11, which is a part of the whole table properties shown in Figure 10. The table is only shown after the search is performed.

Figure 11
Set the display property of the HTML table
Inside the HTML table that you created (shown in Figure 9), enter the following text on the second row:
More than 1 Country was found!
Please choose 1 from the list:
Your template should look like Figure 12. The next step is a bit tricky. I'm going to add a SELECT tag but it is not available on the Any Tag list that I used with the INPUT tag. Therefore, I have to add it manually into the XHTML page. To do so, I add a dummy string such as ZZZ in the place where I want the SELECT tag to be.

Figure 12
The main template at this point
Now you need to move to the XHTML tab as you see in Figure 13. The tab is available on the main screen.

Figure 13
XHTML Tab
Now I search for my dummy string (ZZZ) with CTRL+F and replace it with the string shown in Figure 14.
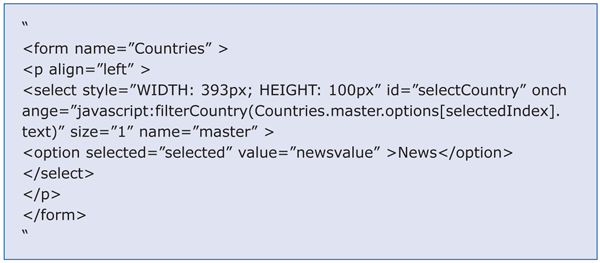
Figure 14
Replace the dummy string with this string
The HTML phrase adds a new form named Countries and a SELECT tag with the id selectCountry. It also attaches a JavaScript function named filterCountry and assigns the selected country to it. I add the Script Web item later. After returning to the Layout view your screen should look like what you see in Figure 15. Click the Layout tab shown in Figure 13 to get back to your main report.

Figure 15
The template with new material (aaa is a dummy value as the field cannot be empty)
Next I add the analysis Web item that shows the results and connect it to my query. I set its visibility to hidden so that it does not show until the user selects a specific country (Figure 16).
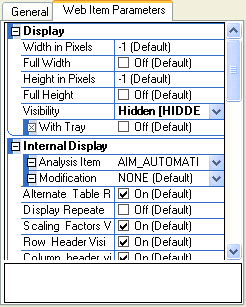
Figure 16
Analysis Web item parameters screen
The next step is to add the Data Provider – Information Web item. Figure 17 shows the list of Web Items. Drag the Data Provider – Information Web item to the design area.

Figure 17
Add the Data Provider – Information Web item from the Web items list
In my example, the Data Provider – Information Web item holds a list of all countries from the query. I use XPATH language in the Script Web item to search the entered phrase.
On the left side of the screen, you have the Web item Properties pane, as shown in Figure 18. Note that I changed the name to DATA_PROVIDER_LIST. Then check the Output Result Data check box.
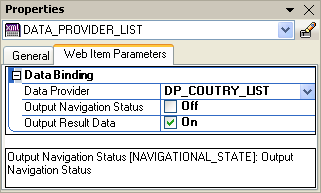
Figure 18
Data Provider properties screen
Now I add the JavaScript by dragging the Script Web item to my template. The Script Web item can be found on the Web items list shown in Figure 17.
The JavaScript includes several functions (Figure 19).
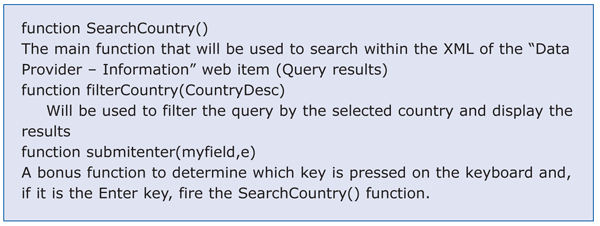
Figure 19
The function list
The function list has a description for every function that I plan to use in my script. Figure 20 shows the full JavaScript code. You copy the code to the Script Web item that you added in Figure 17. A copy of this JavaScript code is also available to download via this link.
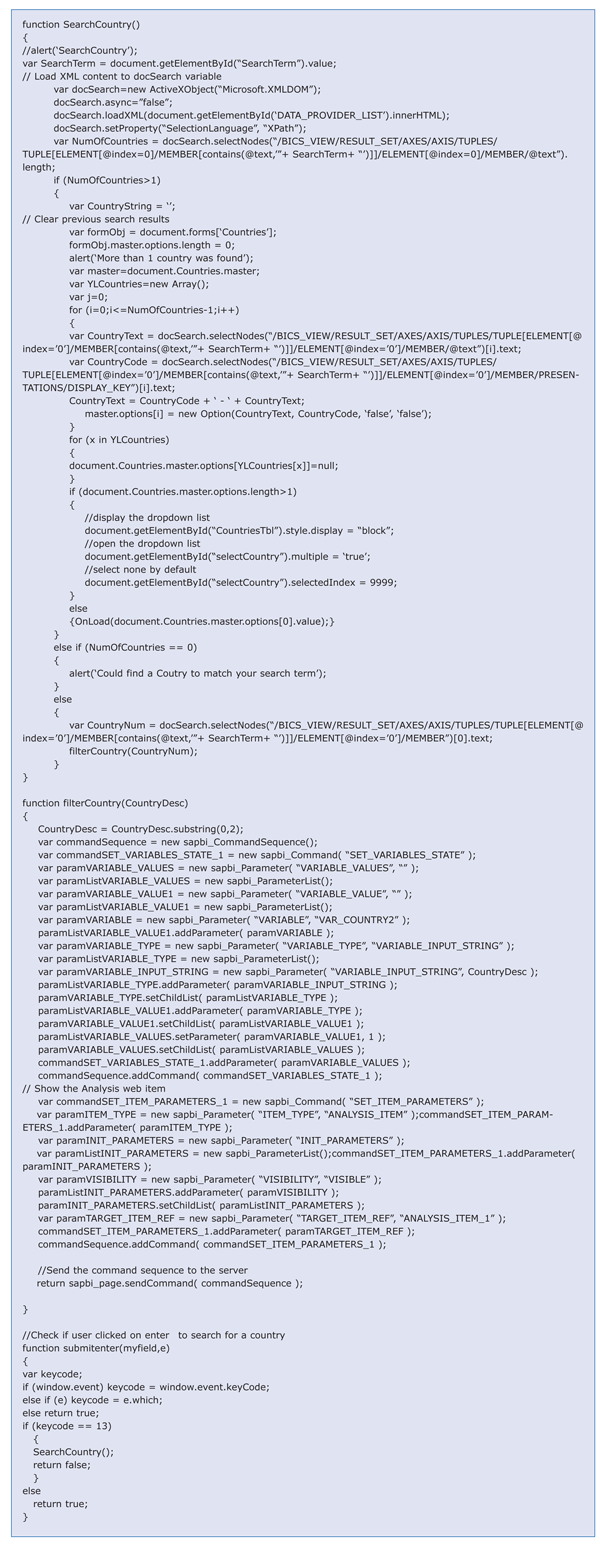
Figure 20
Full JavaScript code
The last step is to connect the button that you created earlier with the SearchCountry function. Open the command button that you created earlier (Figure 8) and change the action to Script Function by selecting Script_Function from the list shown in Figure 21.
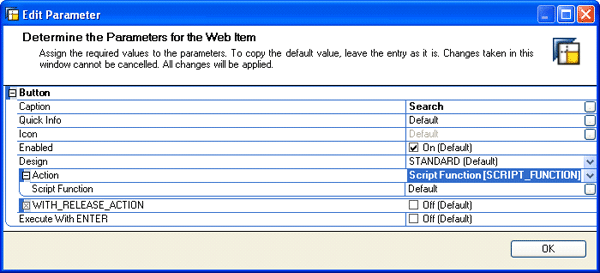
Figure 21
Command button parameters screen
Select the SearchCountry function from the list shown in Figure 22 and click the OK button. The final template should look like what you see in Figure 23.

Figure 22
Select the JavaScript function
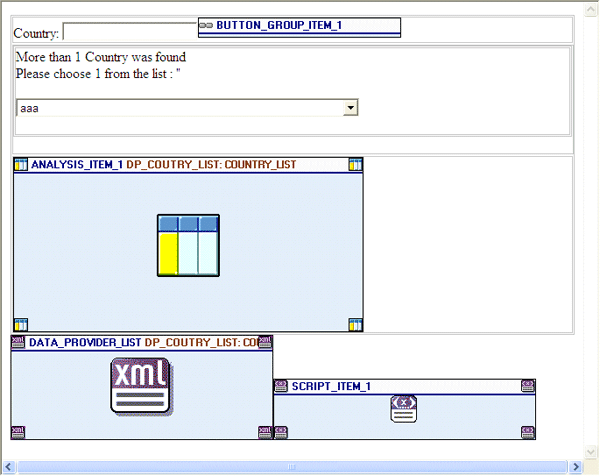
Figure 23
Current view of the template
Now save the template and execute it through the Web template menu item shown in Figure 24.

Figure 24
The Web template menu item
Your first screen should look like Figure 25.

Figure 25
Input tag for entering the search phrase
Let's say the user is looking for Argentina. The user can enter Ar as the search phrase for Argentina and then a pop-up window appears (Figure 26). Note that the search is case sensitive. Click the OK button to see the list of countries (Figure 27).
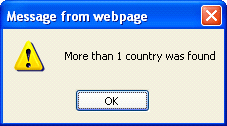
Figure 26
Pop-up window alerts you about search results
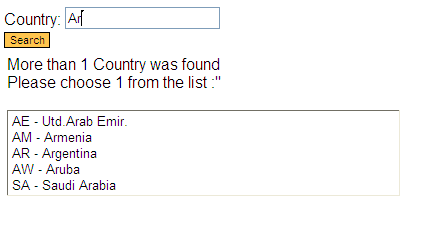
Figure 27
List of countries that have Ar in their names
As the last step choose AR – Argentina.
You can now change the layout as much as you want to fit your needs (e.g., by changing an object’s sizes, colors, or fonts). The process that I describe allows you to select only one object, but you can easily modify it to include multi-selections by changing the query, the variable, and the HTML objects.
Shlomi Weiss
Shlomi Weiss is CTO at BICS Israel LTD. He has 10 years of experience in classic BI and SAP NetWeaver BW. BICS Israel LTD is a niche BI consulting services company that provides a full spectrum of integrated enterprise information management consulting services and solutions, serving a wide variety of enterprises in many industries.
If you have comments about this article or BI Expert, or would like to submit an article idea, contact the BI Expert editor.
You may contact the author at Shlomi.Weiss@bics.co.il.
If you have comments about this article or publication, or would like to submit an article idea, please contact the editor.


